
Here is a pattern for my new favorite project: cabled bracelets! I have a photo tutorial here and then the pattern written out at the bottom if you prefer that method of following a pattern/tutorial. :) If you already know how to make a cable, then this will be really easy.

Supplies: small amount of yarn and needles that are recommended for your yarn type {e.g. sport weight yarn: size 2-4, worsted weight: size 5-8, etc.}. Pretty much whatever you want. :) I use 3 double-pointed needles so that I do not have to use a cable needle {*cough*actually find one*cough*}.
cable needle or extra double-pointed needle.
Cast on 9 stitches.

Knit 1 row.
Purl 1 row.
Knit 1 row.
Purl 1 row.

Slip the first 3 stitches to the empty needle or cable needle and hold that in front of your work.
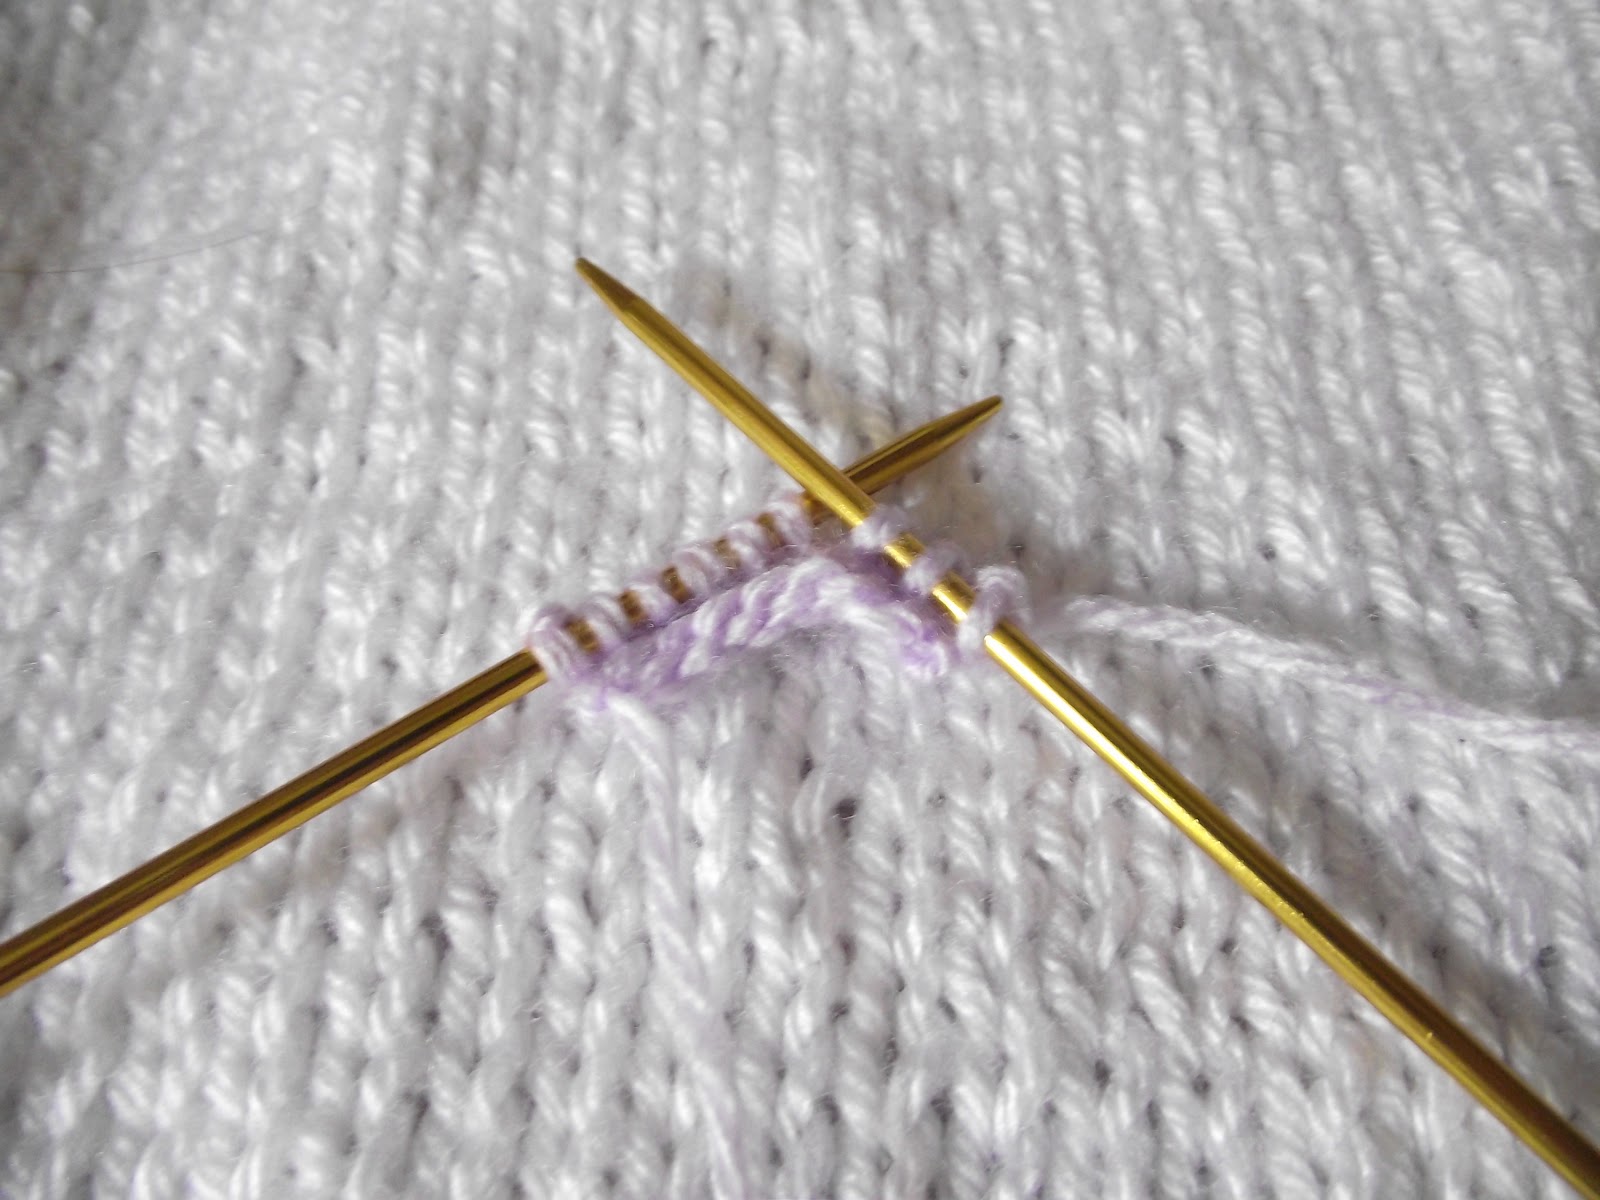
With your empty needle behind the slipped stitches, knit the next 3 stitches.

This is roughly what it should look like:

Take the needle with the slipped stitches and pull it around the stitches that you just knit. Knit the 3 slipped stitches.
Knit the last 3 stitches.

You have now made the first cross-over!

Knit 1 row.
Purl 1 row.
Knit 1 row.
Knit the first 3 stitches.

With the extra needle or cable needle held behind your work, slip the next 3 stitches onto it.

Knit the last 3 stitches of the row, making sure that the slipped stitches stay behind your needles.

Take the needle with the slipped stitches and bring it around behind the last 3 stitches that you knit. Knit the slipped stitches.

Knit 1 row.
Purl 1 row.
Knit 1 row.

Now just continue repeat from the first cable row until it is as long as you want!

Cabled Bracelet Pattern
Supplies: small amount of yarn
needles that correspond with you yarn weight
cable needle
I actually use three double-pointed needles instead of two needles and a cable needle.
Cast on 9 stitches.
Work in stockinette stitch for 4 rows.
*(Cable) Row 1: Slip the first 3 stitches to the cable needle, hold in front. Knit 3. Knit 3 from cable needle. Knit last 3 stitches.
Rows 2-4: Work in stockinette stitch, ending on a purl row.
(Cable) Row 5: Knit 3. Slip next 3 stitches to cable needle and hold in back. Knit 3. Knit 3 from cable needle.
Rows 6-8: Work in stockinette stitch, ending on a purl row. *
Repeat from *to* until bracelet reaches desired length.
Enjoy your bracelet! If you have any questions about anything, please ask!
That is so pretty! I am so going to do this soon! :D
ReplyDelete~Lily
lilycarolinephotography.blogspot.com
That's really cute! :)
ReplyDeleteOh, my gracious, Emily!!! Thank you so much for sharing this tutorial, dear! I've been hunting around for a cable bracelet tutorial, found one, tried it, and failed it. :( The instructions had typos in it {just believe that instead of the opposite: my being a horrible knitter :P}, but this looks like clear instructions. ;)
ReplyDeleteThank you again, you talented knitter you.
*hugs*
Grace